Performing a migration
A migration consists of three key elements:
- the source server where Otto retrieves one or more files to migrate
- the destination server where Otto transfers one or more files
- one or more files copied from the source server to the destination server
Migrations require a full commercial license for Otto. You can try a 'demo' migration with the free license. See here for more information on how to do that.
Setting Up a Migration
Enter File Credentials
- Choose the correct server on the left. Then click on Migrations.
- Enter the file credentials for the source server (From).
- Enter the file credentials for the destination server (To).
When adding credentials, use either a full-access account or an account that has the fmmigration extended privilege (Note that you’ll need to create an extended privilege with this exact name). Enter the Encryption key, if applicable.
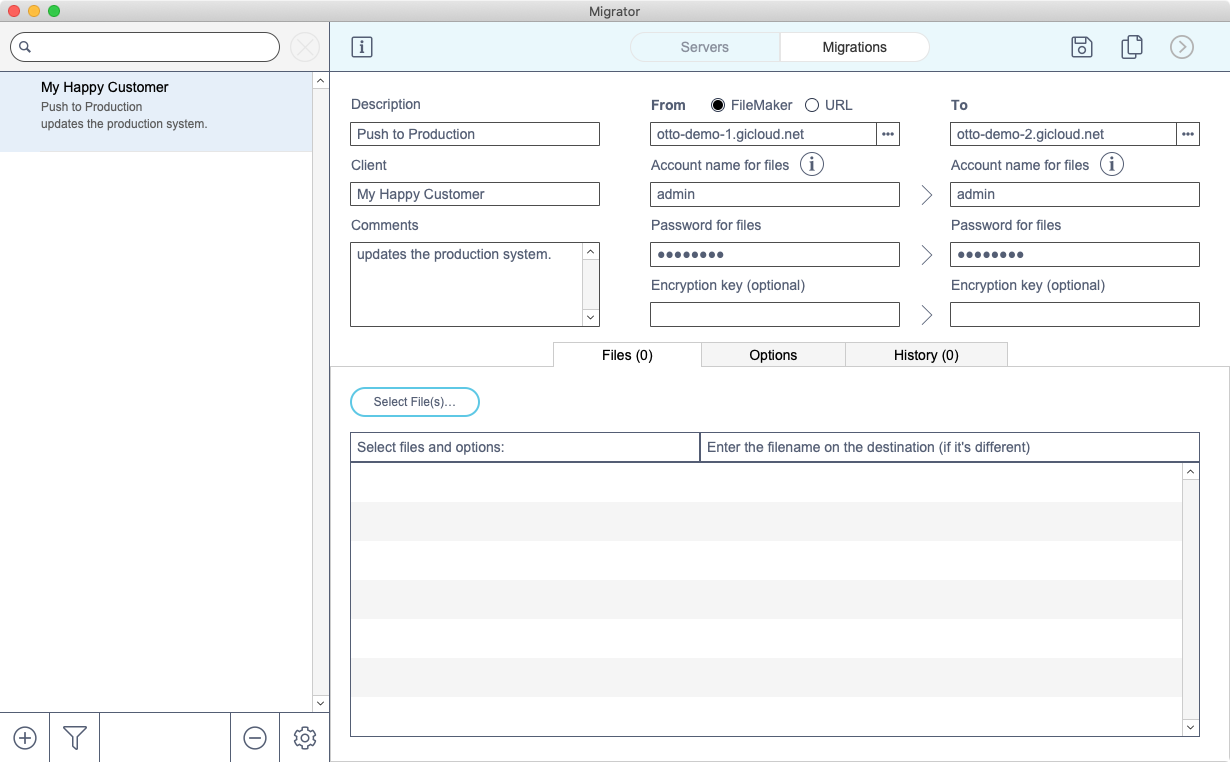
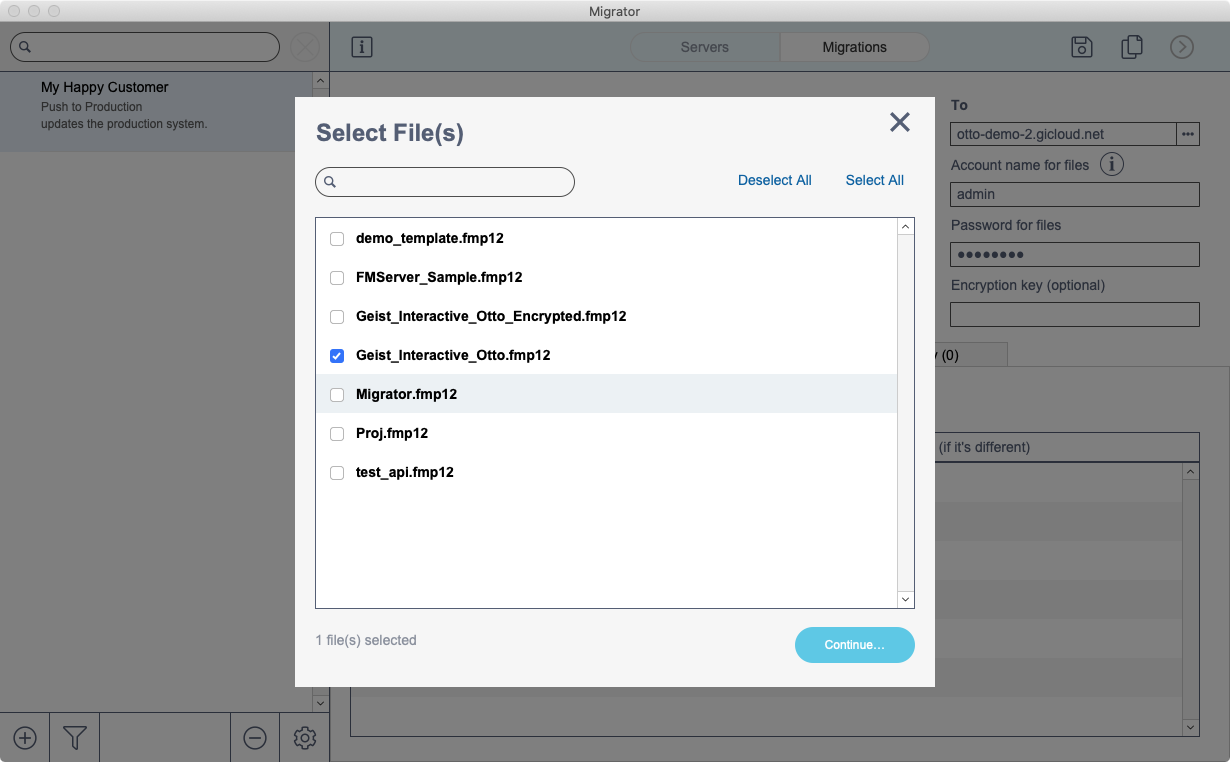
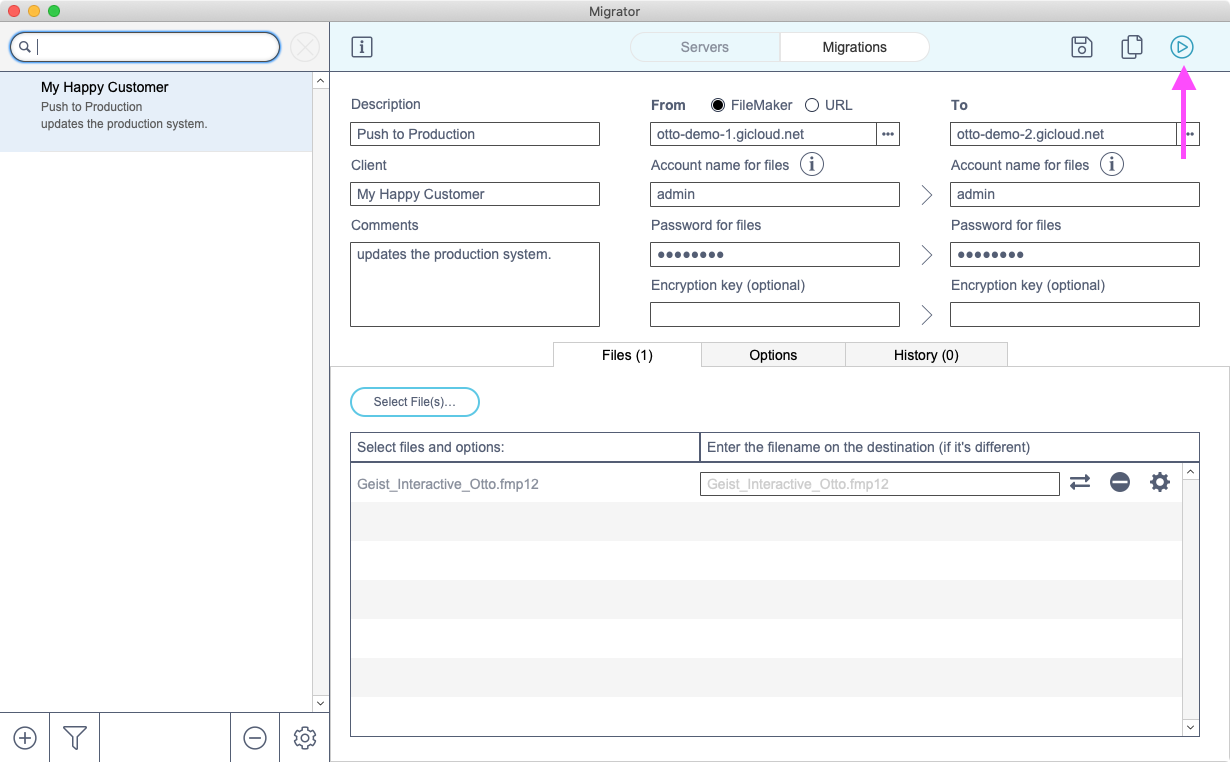
Selecting files
- Click Files... and choose one or more files to migrate. Click Continue.
- If the migrated file should have a different name, enter the destination filename.
- Click on the icon next to the filename to choose the type of migration.
- If you want to create a clone of the file, move it to the destination server, and migrate data into the file, choose Migrate.
- If you want to copy the file with its existing data to the destination server, choose Copy. This option is often used to host a file for the first time on the production server.

Starting a migration
- Click Start Migration in the upper-right hand corner.
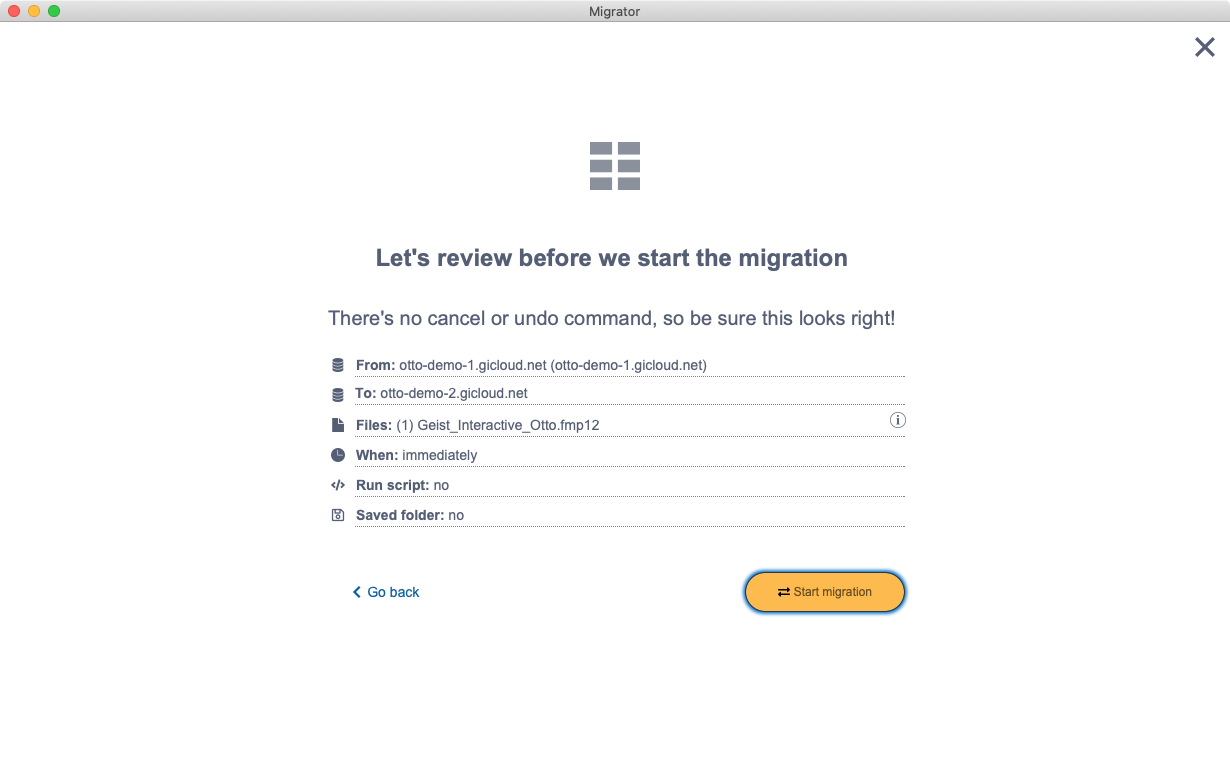
Choose whether you want the migration to happen right away or schedule it for later. In either case, you will be able to review all settings before the migration starts.

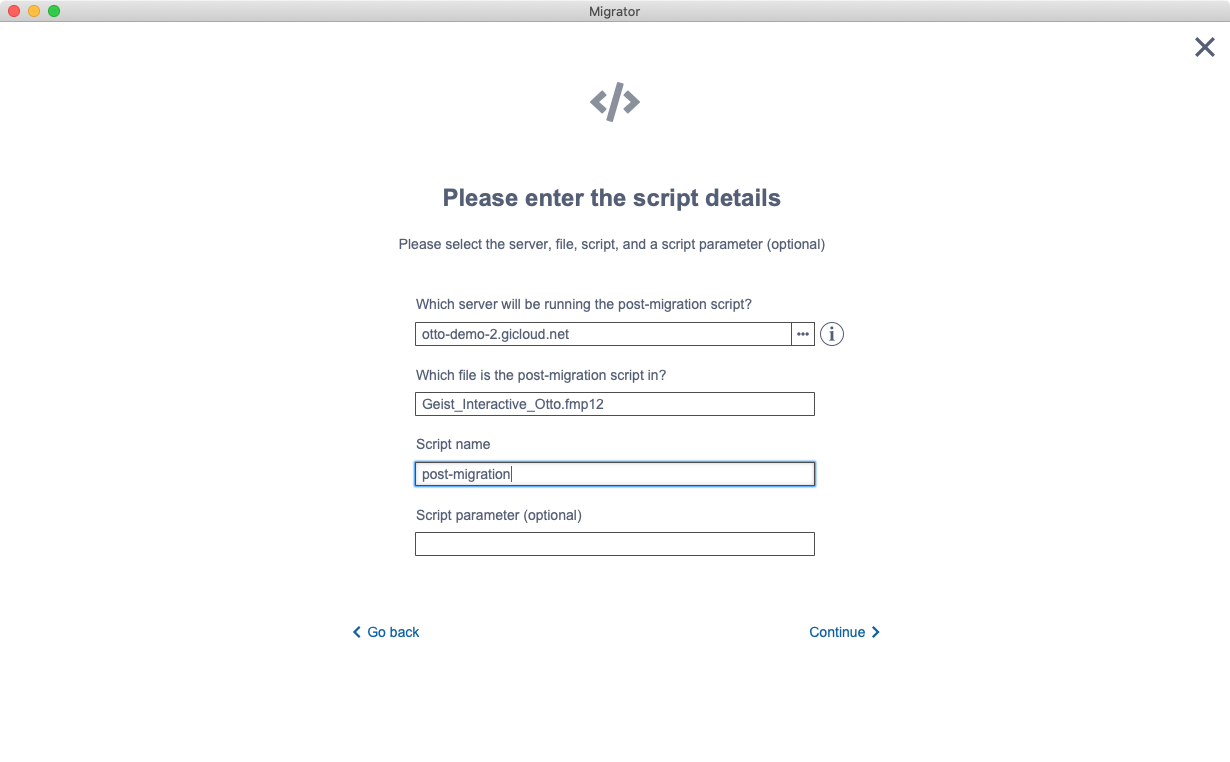
Choose whether or or not you want to run a script after the migration.

If you select to run a script, enter the following details:
- The name of the file that contains the script
- The name of the script
- The script parameters, if any
- If you want to create a clone of each file before the migration, enter a folder name where the clone should be stored. If you are concerned about timeouts, enter a longer wait interval.

- Review your migration details. Once you’ve verified the details, click Start Migration.
Migration options
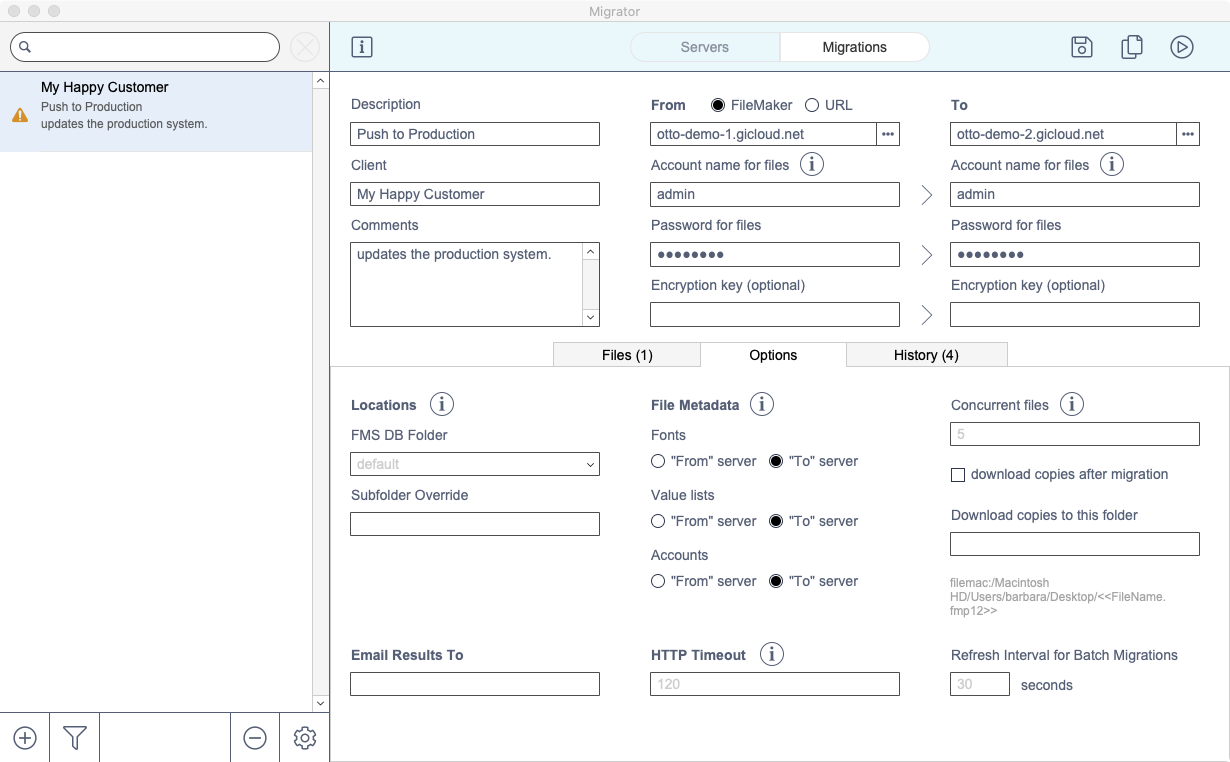
The Options tab provides extra functionality for all files involved in the selected migration.
Locations
If the files you are migrating do not yet exist on the destination server, choose one of the three folders where Otto can migrate the files. You can also include a subfolder. If your files already exist on the server, the location settings will be ignored.
Email results to
If you want to receive an email with the migration details, enter an email address
File metadata
You can choose to retain the font mappings, value lists, and accounts from the source (From) or destination (To) file. By default, all metadata in the source is retained.
HTTP timeout
At the start of a migration, an HTTP request initiates. The default timeout is 120 seconds. For larger files, you may want to increase the number of seconds before timeout.
Concurrent files
When a migration runs, it initiates a process on the server and multiple can run concurrently. By default, the server can run 5 concurrent migrations. Change the number to increase or decrease the number of processes that can occur simultaneously. Note that increasing the number of concurrent migrations does not necessarily mean faster performance.
Download copies after migration
You can choose to download copies of the migrated files after the migration is complete. They will be saved to your Desktop by default, and you can provide an alternative folder. If the files are very large, consider running a backup, then using the Otto web console to download a zipped archive. This may result in a substantially smaller file.
File specific overrides
You can customize settings similar to the Options tab on a file-by-file basis, by choosing the Files tab and clicking on the gear icon.

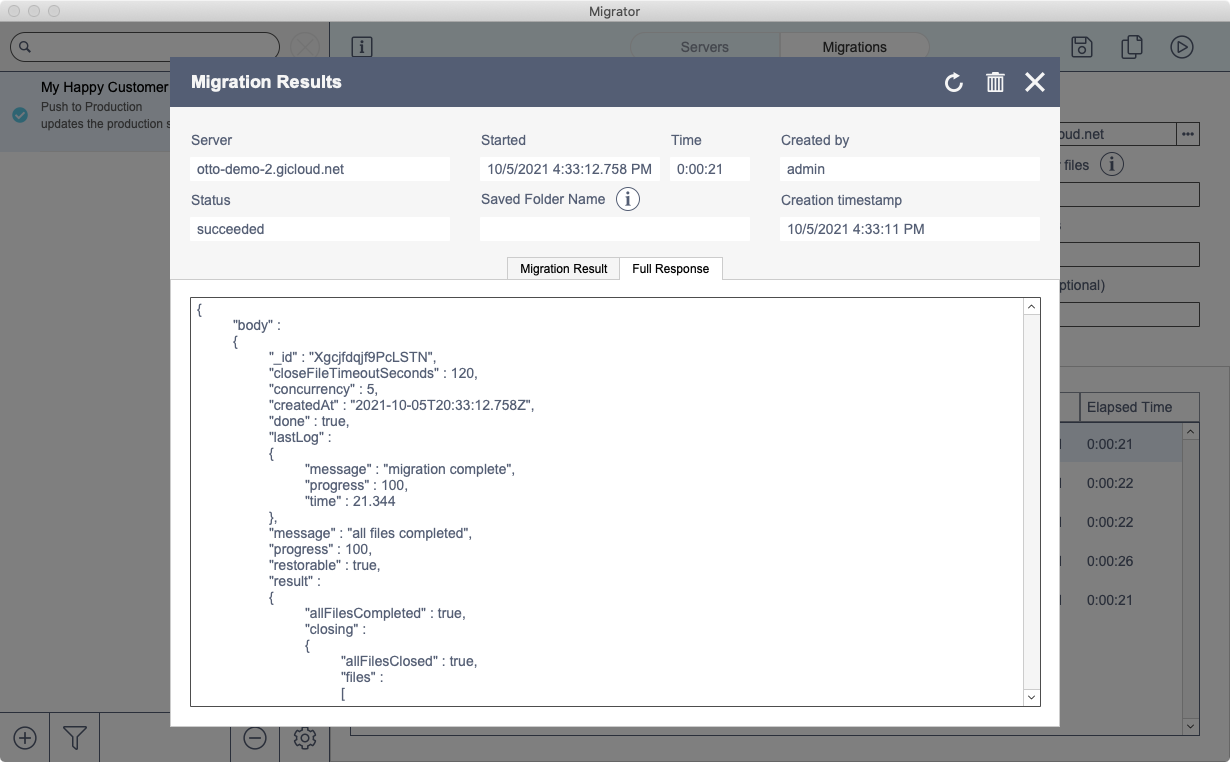
History
Here you'll see a list of migration attempts and the related results. Click on the row to view more detailed information.
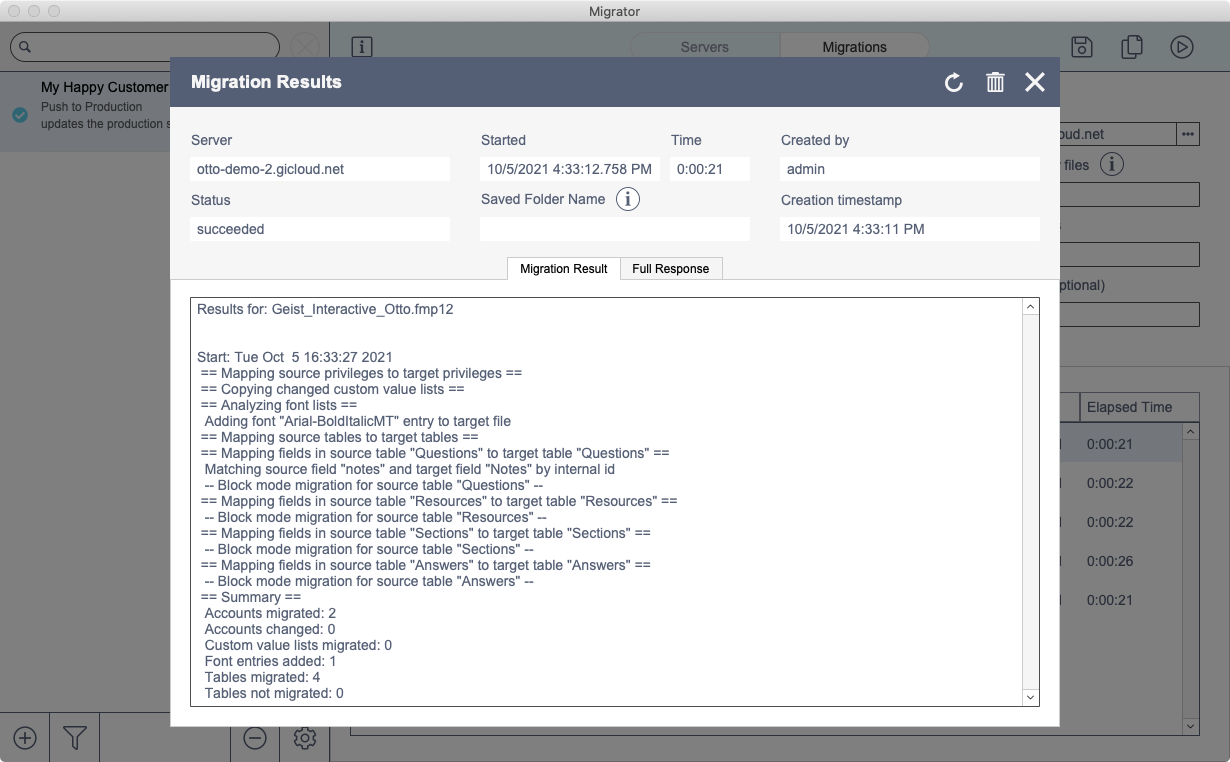
The Full Response panel shows the Migration log in JSON, as provided by Otto. Click the refresh button at the top right to retrieve the most current results.